Showing posts with label pizza. Show all posts

Sunday, May 22, 2011

Summer's here, so break out the pizza and beer! (Pt. 1)


Hey foodies! Testing the Water is back online after a rough conclusion to my first year in grad school. I'm currently back in Richmond, VA unwinding with the pizza party. We've been brushing off our pizza making skills by welcoming some new cooks into the circle, testing out some different preparation methods (ex. lower hydration ratio in the dough- but more on that in a later post), and some experimental toppings (we're hiding these pictures in the vault next to Operation Bin Laden for now). The weather is gorgeous, the beer is cold, the pizza is hot, and the company is incomparable. I'll let the pictures do the talking.


Belgium blonde ale: flavors of citrus, cream, and alcohol.


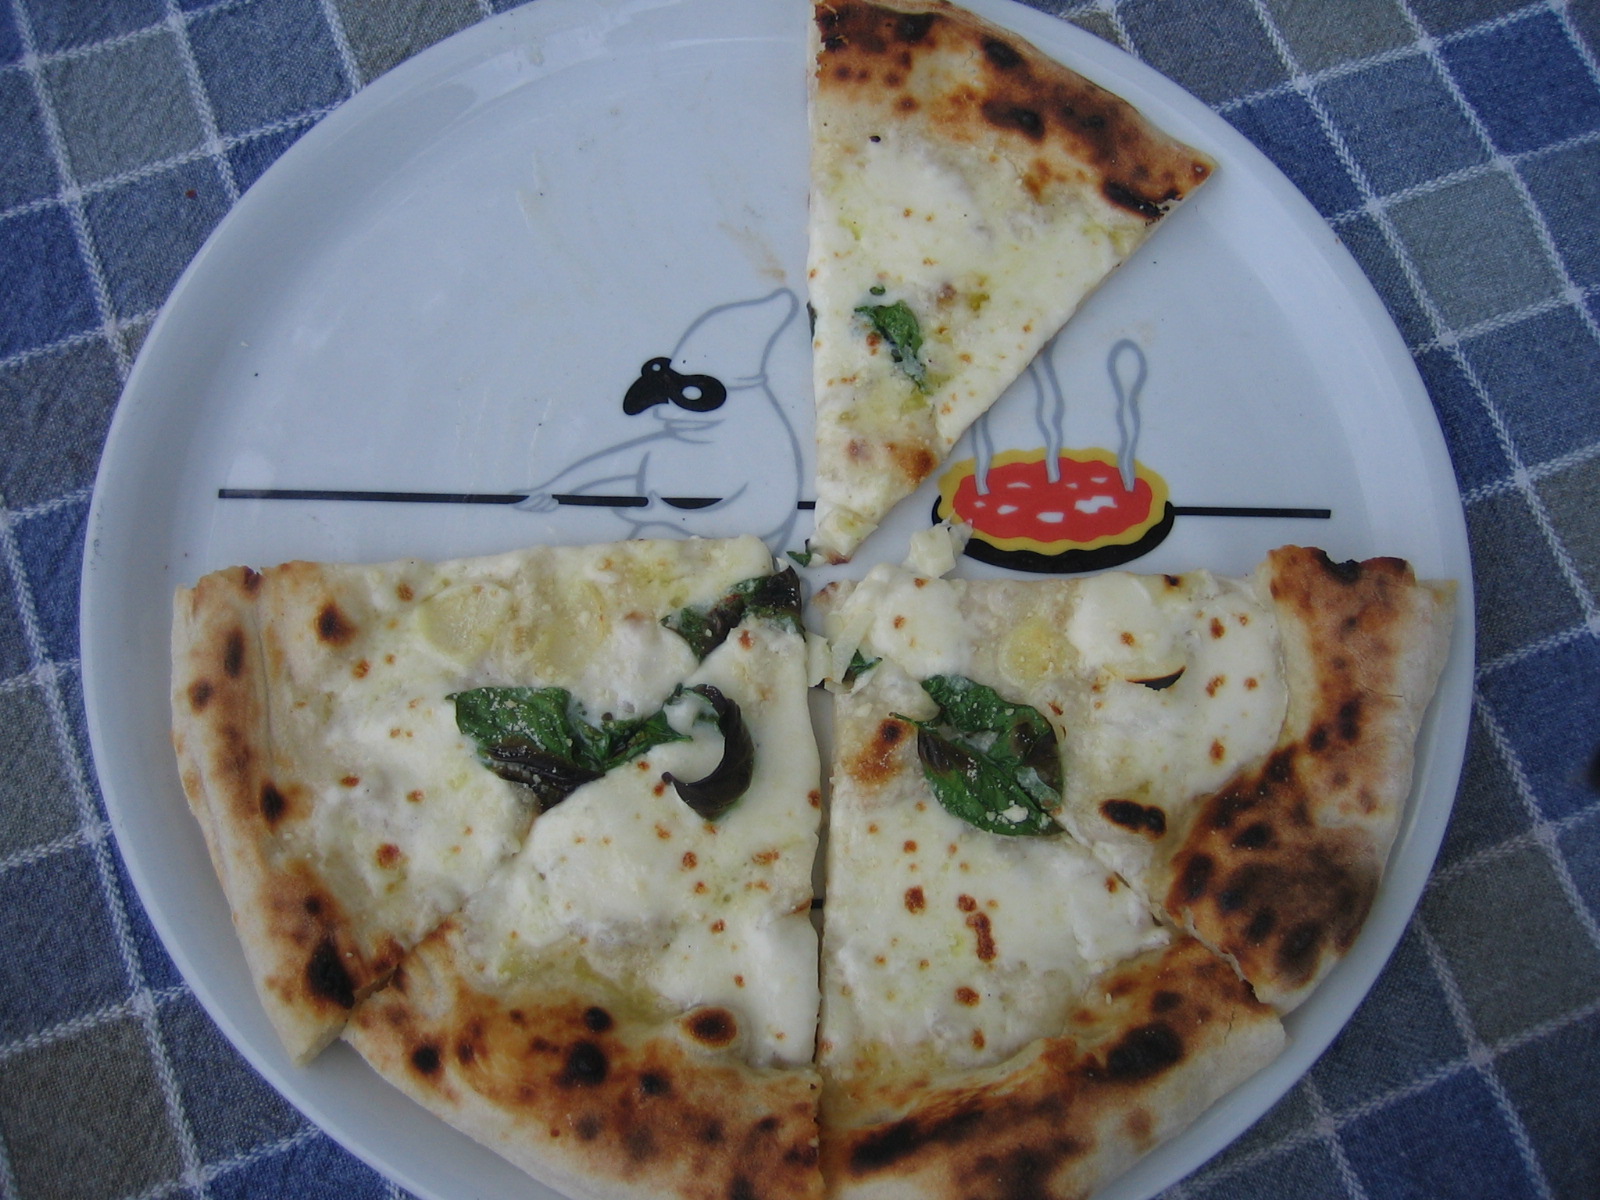
White pizza: garlic, olive oil, basil, mozz.


A last minute squeeze of lemon brings it all together.


Very nice garlicky flavor. By far, the best tasting pizza of the night.


Skipped out on the Bell's Oberon mini-keg this summer, which was the beer (un)official beer of summer 2010. A couple of us have tasted this season's Oberon and it just seems to lack flavor. Anyone else know what I'm talking about?

Southern Tier's pale ale sampler pack includes their pale ale, IPA, Phinn and Matts (slightly dark pale ale), and 422 (wheat pale ale). All of them are sure to please a hops fan. We look forward to drinking these during hot summer nights.


The infrared thermometer is reading about 950 right above the stone. With the broiler on, it maxed out at over 1100 degrees (F). Pizzas cook in under 3 minutes.

Needless to say, the pizzas featured in this blog are prepared by cooks that have been trained at the school of hard culinary knocks using kitchen appliances that are almost as old as we are. We don't recommend everyone try this at home, as a drop of sauce on your fru-fru glass window oven will cause it to shatter.


A pizza margherita with some crust that got a little too happy in the oven (but was still delicious).


"Green" dining.


The last pizza of the night was made with dough by a rising pizza chef. This feletti pizza (grape tomatoes, cheese, garlic, basil) is well paired with the first cold glass of rosé of the summer. What? Afraid to drink pink wine? This ain't the white zin your momma drinks at her book club meetings. Educate yourself.

Sunday, December 19, 2010

$5 Homemade Brick Pizza-Oven - Test #1


With my first semester in grad school officially in the books, I decided to take a day to decompress. I've had a lot of things on my "to-do" list that have been put off to the side because of schoolwork. Making my tiny apartment oven into a better pizza machine was certainly near the top of that list.

So how did I do it? Well, after doing some research on the intertubes, I headed down to my local Home Depot. I picked up a couple (3) regular red bricks (probably should've measured the dimensions of my oven first). I also bought 8, unglazed tiles from the flooring section. They are fairly thin, maybe a tad thinner than a pizza stone. It's important to buy the unglazed (non-shiny) tiles, or else you're going get a big side of chemicals with your pizza. I consulted an HD worker who told me I indeed was buying the unglazed stuff, so I'll let you know if I end up in the hospital anyways!


Altogether, the supplies cost me a whopping $5. No kidding. Cheaper than a pizza stone. After rinsing and wiping down the stones with water and a clean towel (don't use soap- it'll contaminate your pizza's flavor), I rearranged my oven racks to give me enough space to put the stones inside. I set my oven in "warm" for about half an hour to make sure the stones were dry. After the stones were dry, I pulled the brick out and wrapped it with 2 layers of foil (just because). If your oven is bigger than my easy-bake sized one, I suggest putting a few bricks on the side to really make an all-stone enclosure. Next time, I am also going to lower my top rack down so that the "roof" is closer to the pizza, and thus- will brown the top of my crust a little better. We'll see how that goes.

I made 4 pies (in the order that they were made):
1) Bianco Arugula: olive oil, garlic, salt, arugula, lemon juice, olive oil, parm reg
2) "Puttanesca": tomato sauce, sliced black olives, anchovies, capers, red chili flakes, basil, parm reg
3) Puttanesca w/ Moz: Same as above except add shredded moz
4) Red Arugula: Tomato sauce, chili flake, arugula, lemon juice, olive oil, shaved parm

Notes on some of the ingredients:
-I bought 2 Giant-brand, regular pizza dough balls (each cut in half to give me 4 pies). This dough is mediocre (need more salt), but it was convenient.
-For the sauce, I used 1 can of Cento-brand plum tomatoes, rinsed, de-seeded, mashed, drained of liquid, and then mixed with their canned puree. There was plenty of sauce left over.
-I just used Giant brand bagged and shredded moz. Yeah yeah yeah, I know- but i really didn't care. As you can see- I kinda like pizzas with less cheese anyways.
-Olive oil: I've been working my way through a bottle of California Olive Ranch XV. It's pretty damn fruity, unlike the "spicier" notes you get from stuff from Europe. Each has their own strengths. I don't really ever heat it (I just sprinkle it on the final, hot product). I really like this stuff in dressings or on bread. It can overwhelm some dishes though.
-Cento anchovies wrapped around capers in oil

I apologize for the appearance of my pizzas. I haven't made a homemade pizza in months and I'm clearly off my shaping game. The arugula pizzas turned out a little funky. The first one was stretched a little too thick and a dough "malfunction" made the last one hard to stretch beyond a flatbread shape. I also apologize for some of the quality of the pictures. I'm going through post-exam-week caffeine withdrawal, hence the shakes. Excuses aside, here are the results from the first test run.

*Warning: Pizza Porn Below*

Bianco Arugula


Puttanesca


Puttanesca w/ Moz


Red Arugula


By far, the best crust award goes to the Puttanesca w/ Moz. I was able to get the dough stretched out thin enough to give it a good crunch but not too thin that the sauce soaked through.

I'll keep you updated on future trials with this new pizza setup. Keep posted to TtW over the holiday break for more pizza updates, as I reunite in the kitchen with my buddy Nathan. Happy holidays!

Monday, August 2, 2010

A Pizza Story

For those of you who were in direct contact with me last week, you probably knew that I was teaming up for with my long-time, best friend and fellow foodie, Nathan, for a little test of our culinary prowess. It's been no secret to our close circle of friends that over the past year Nathan has tested his pizza recipes through various forms. I feel like I have been there along the way to offer my opinions, make suggestions, and learn a little bit about the ancient tradition of bread-making. Just think about it- the basic staple of a large portion of the world's diet is made up of just water, flour, and yeast. To join in this practice is to contribute to a lineage of bakers, both amateur and professional, in order to advance the flavors and textures of a food that many of us take for granted.

Pizza is a perfect site to explore the wonders of this trifecta of ingredients. Just think about it: who doesn't like pizza? No one I would trust, most certainly. Of course we have all had bad pizza here and there. Hell- some of us might have been so weened on bad, commercially stamped-out pies that we might not even know better. There are certainly pizzas that are simply fit for consumption and basic sustenance when we most need it (For example, Chanello's or Assantes here in Richmond). Then there are pizzas that surprise us with interesting new flavors that break the boundaries of conventionally-held thoughts on pizza (I suppose the Wolfgang Puck movement and California Pizza Kitchen would fall under this category). Regardless of what type or quality of pizza people it is (generally) a communally-eaten food. Where there is pizza, there are usually people. Pizza is great because it is one of those foods that is capable of bringing people together that span various age, demographic, and tastes.

That last paragraph might seem like a digression from my core story, but it's not. It actually situates the events that culminated over the past past week quite perfectly. Ya see, my buddy Nathan signed on to a pizza tour. The pizza tour is sponsored by a group of Richmond foodies called Pamparius. In essence, the group is headed up by two bikers with a blog and a belly for pizza. Participants of the second-ever Pamparius Richmond Pizza Crawl payed a flat fee to cover the cost of the pizzas at 5 of Richmond's newest and/or best pizza places. From what I heard, the final count was about 50 people who were willing to spend their Saturday night biking up and down the streets of Richmond in search of the city's best pie. There's this post's theme- pizza bringing people together. Something like this doesn't come out of thin air; I give major props to Pomparius' Grant and Andy for pulling this thing together and making sure things were planned precisely.

On the other end of this pizza tour, there was another pair of guys- Nathan and I. With the blessing of his roommates and significant other, we spent the last couple of days before Saturday's crawl working out some last minute details. We took Thursday's dinner to take a test run on some last minute variables. However, some loose ends presented some difficulties: Do we need a new pizza peel? Yeah, we should get one. Which mozz is best from the results of these test pizzas? Damn, this one is too dry and just flares up in the oven. This mozz has too much liquid; it'll probably just turn into a pile of goo. Wow! -This cheese is perfect, we should rush back to Kroger and buy the rest of it up before it's gone. Can we grow enough sourdough starter to make 8 pizzas in time? How are we gonna accommodate 50 people into a city apartment? Or worse- how do we accommodate 50 people INSIDE if it rains?


Eventually, most of these concerns resolved themselves by the day-of (except for the 35% chance of a thunderstorm by late Saturday night). Saturday morning, the whole apartment woke up. Some cleaning and rearranging took place. Nathan and I cleared out any extraneous items from the kitchen and cleaned the surfaces. The giant batch of hand-mixed dough had sat overnight in a cool place to rise and ferment. The first success: the dough smelled and looked great. It smelled like fresh cake and was the real sticky-icky, ooooh-weee! Nathan portioned the giant mound of dough into 8 balls of 330g apiece using a digital scale. Then- each ball was shaped and allowed to proof again at room temperature.


In the meantime, we brainstormed a menu. We knew that this was a rare opportunity to spread some buzz around Richmond if we ever decide to wade into the local restaurant pool. I came up with a menu design based around Nathan's pizzas. We ventured off to get them printed off (thanks to his girlfriend). At first site of the printed-off menu, we thought, "This operation looked legit." Lastly, we stopped off at the Carytown Ukrop's...errr Martin's to pick up some arugula for the last pizza. Kroger's arugula looks closer to baby spinach. Martin's has the right stuff, it's just that it's mixed with baby spinach. Thus, some manual separation was necessary. If anyone from Martin's is somehow reading this blog: get the Nature's Promise brand of baby arugula in every one of the Richmond-area stores! If some guy who is making arugula pizza in his home kitchen doesn't buy it all up, I'm sure some yuppie transplant from Ellwood's or Whole Foods will graze on it. Anyways- by 5:00pm or so, everything was prepped. The dough balls looked like oversized freshwater pearls, the arugula was separated from its leefy brother-in-prepackaged-arms, the mozz was sliced and diced, the garlic was chopped, the basil was picked, etc. etc. As Tony Montana would have said, "We were ready for war."


The crowd arrives

From about 5-9pm, we indulged in a few Sierra Nevada Summerfests as we enjoyed the quiet before the inevitable storm. The crowd wasn't planning on showing up until 9:30pm, but they left their first stop a little late. We thought we had more time to chill. At around 9:10p, Nathan gets a text from the pizza crawlers: "On our way from Stuzzi's." Stuzzi's is the latest place that is trying to bring authentic, Neapolitan pizza from the former site of 1 North Belmont. It also happens to only be about 3 blocks from Nathan's house. We had to get workin' fast.


So, Nathan stretches the first dough ball. We begin to work in tandem, like a dance in the kitchen. He works the dough, while I tango line back and fourth between the oven and the fridge pulling ingredients. We struck an instant harmony. Before we knew it, two margheritas were ready to go, wrapped in foil, and waiting for their hungry patrons. As soon as the second pizza popped out of the oven, about 35-40 bikers with their strobing headlights pulled around to the backyard. It was an adrenaline-inducing sight for us. Nathan's roommates went down to greet everyone and try to bring them up. Instead, they chose to hang out in the backyard. Fine by us- less people inside to crowd our space. Grant and Andy of Pomparius came up and were excited to serve Nathan's pizza. They have sampled it before and loved it. However, their fellow pizza crawlers didn't seem too enthused about the other Neapolitan-style pizzas that they had tried earlier. Both of them were concerned that they would also be turned off by Nathan's pizza.


However, the first round of tasters were pretty impressed that there was pizza ready to go. The other four stops were all restaurants; we were the only house on the stop. Our dough was hand-mixed, not blended in an industrial sized mixer. Our dough was naturally leavened, and wasn't proofed in a commercial box. All of these other places had an entire staff of prep cooks and people on their ovens, whereas we had two. There was no D.O.C.-certified wood-burning oven or large, gas deck oven at "Chez Dooley." We relied on the apartment's old Gibson-brand electric oven. All of this David versus Goliath thought was something that was deeply in our minds, but it wasn't apparent in the pizza crawlers. As we were spitting out pizzas, in and out from the kitchen, we had a few people who came up to see what all the fuss was about. One person said, "Grant told me I had to see the oven. Where is it?" I said, "It's right in front of you." Their reply, "You gotta be kiddin'. I dunno how you got THAT oven hot enough to make crust like this."


Where all the action happens

And the complements boosted our momentum as the night went on. We got compliments that the pizza was the best they've tasted that night, or ever for that matter. The last few pizza crawlers that stuck around until the end of the crawl were rewarded with the Rucola, one of the house's favorite pies. Nathan shoved the last piece into my mouth and the mouths of all his roommates, who had graciously dealt with the madness leading up to the event. It was a taste of accomplishment, commitment, and of spicy, meaty arugula! After, we slammed a few whiskey shots down and headed to a bar down the block to dance in celebration of the night.


In all, 8 of the best pizzas I've seen Nathan make were pulled out of that oven that night. The whole production was a team effort from the guys at Pomparius to everyone at Nathan's apartment. The pizza gods smiled down on us with good weather, perfect pizza, and great company. I'm so damn proud of him and I feel nothing short of pure bliss whenever I get a chance to work in the kitchen with him. Moments like that remind us all why we love food. The passion, the torment, the climax, and the resolution. A good food story is much like a great movie or a great novel for all of those reasons. Hopefully, that night will only be the end to one chapter in this Richmond-based pizza story. And that my friends, will have to be continued...

Monday, July 26, 2010

Pizza Party + What's Wrong w/ Your Bread?

I've been spending a few weeks back home in Richmond, VA. My days here are rarer and rarer, which is unfortunate because my best friends still live in the city. But-- nothing brings us together like food, drink, and a good time. Last weekend, my buddy Nathan put on a fantastic, 6-pizza feast for us. This guy has spent the past 2-3 year perfecting his recipes, trying to get as close to the best, sans-woodfire grill/homemade pizza possible. For long time TtW followers, you will remember a long streak of posts (now archived on this blog) that I devoted on my experiments with homemade pizza. Well, you all can blame Nathan for that.

Anyways, what's Nathan's secret? Here are just a few things I've picked up from him (hopefully he doesn't mind!):
-For his sauce, he uses canned (Cento-brand) whole tomatoes that have been rinsed, seeded, then crushed
-He uses a sourdough "starter" made from imported yeast from some old mill, bakery, or something like that in Italy: this gives his crust a more developed, sourdough taste. This step isn't for everyone, but it's worth the investment if you make a lot of bread
-For cheese- water content matter: too dry and the cheese burns, but the balls packed in water just turn into goo unless they are wrapped in a paper towel for a little while in the fridge
-No olive oil in the dough mixture (it burns at high temps)
-Lean towards recipes that create more of a "wet" dough: this simply means a a higher proportion of water to flour

-Don't punch down the dough after it has proofed initially, contrary to a lot of common pizza dough recipes
-To get your oven and stone as hot as possible, preheat it to the max temperature for at least an hour before cooking
-Use the broiler setting when actually cooking the pizza, and if you can turn the broiler on independently of the bake setting then use both when cooking the pizza
-Rotate the pizza with your peel during the cooking process to ensure even cooking


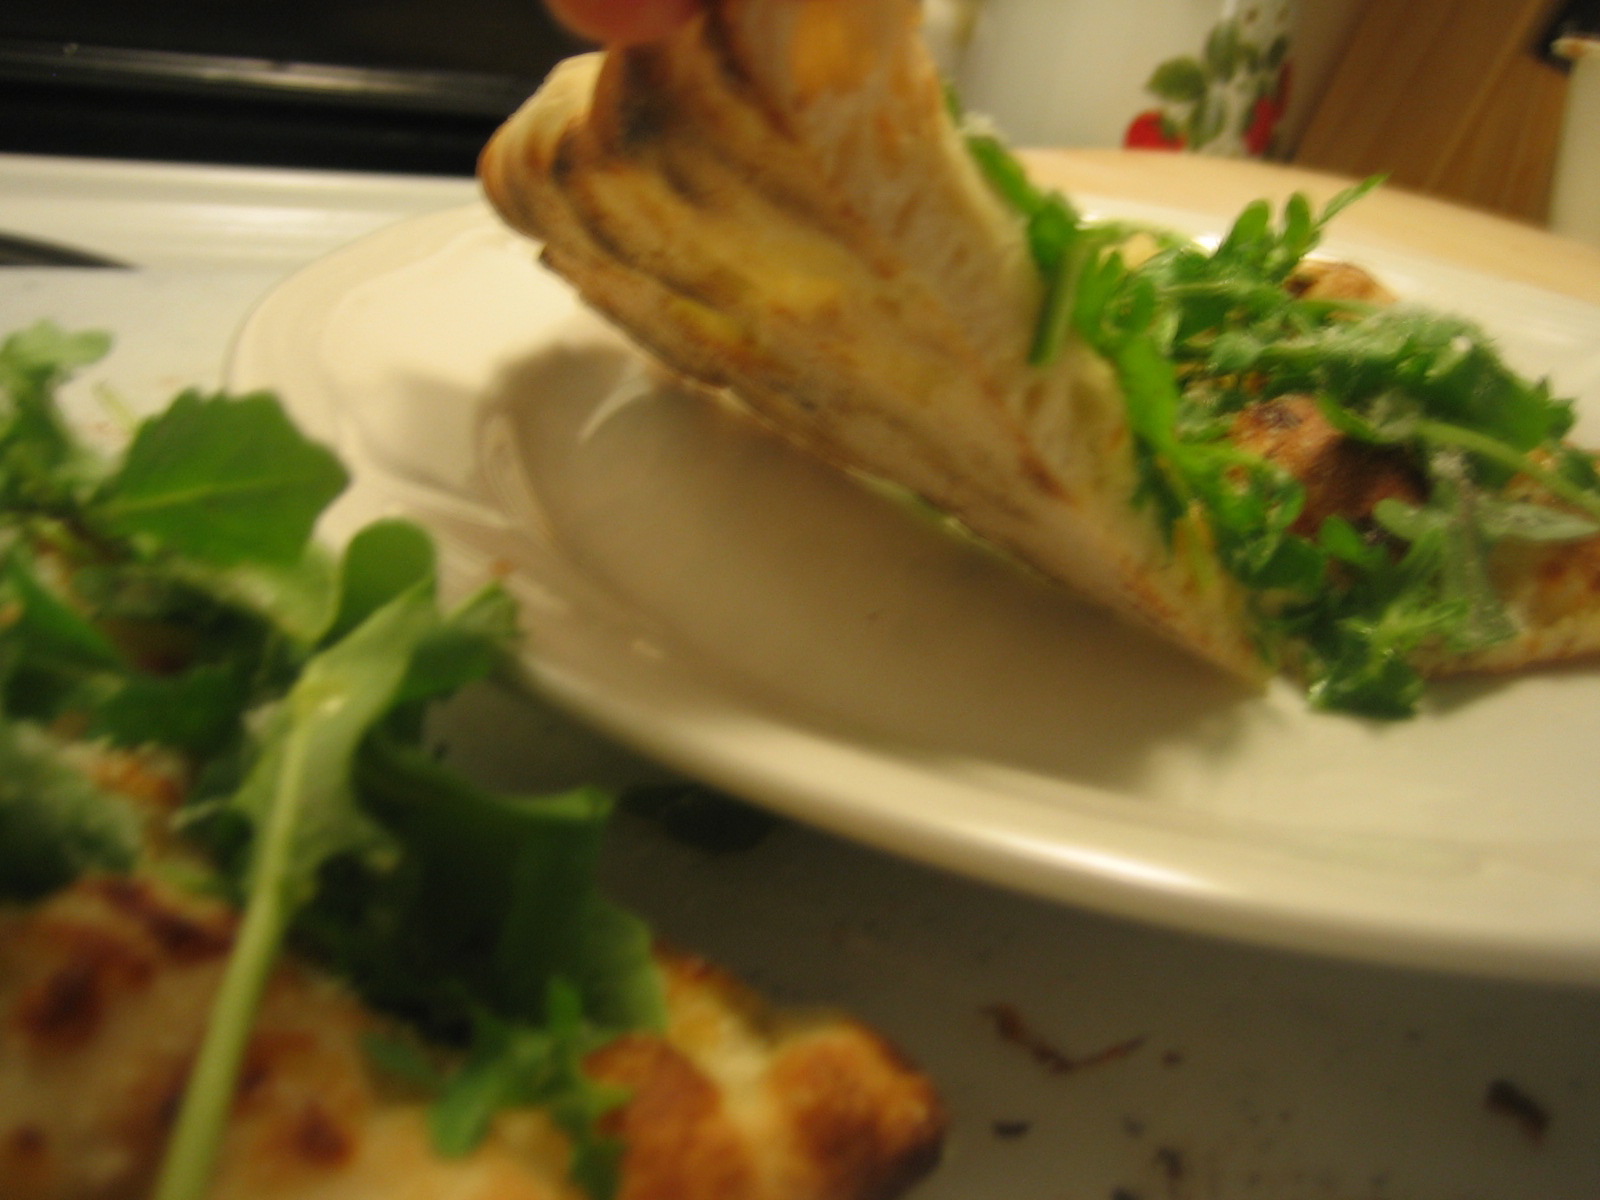
The result is a thin crust pizza with just the right amount of dark, blisters on the bottom of the crust (a characteristic usually only found on pizza made in HOT wood-fired, brick ovens). The toppings are the time-tested compliments to the main star of this pizza: the crust! Speaking of- the crust has the taste and chewiness of a a good sourdough loaf, with plenty of airy bubbles. Yum! In addition to the traditional margharita-style, he also made a red pizza (no cheese), white pizza (no sauce) with and without garlic slices, and the crowd favorite- a white pizza that is topped with baby arugula and lemon juice after it comes out of the oven.

Just in case you were wondering- we had a mixture of drinks. I bought a French rosé from the Rhone Valley ($8 on sale) that I quickly grabbed and chilled at my neighborhood Kroger. This wine wasn't too bad: it had a slightly sweet strawberry initial taste on the tongue with a dry finish. I recommend the other rosé I have reviewed on the site. Go ahead- utilize the "search this blog" feature and type in "Tavel" or "rosé". My other buddy, James, also scored us a mini-keg of Bell's Oberon summer ale. I highly recommend the Oberon as a crowd-pleaser.

With the "itis" kicking in full force, Nathan showed me a few interesting links related to the topic of the night's featured, epicurean indulgence. The most interesting one was related to the health benefits of REAL sourdough bread. When I mean REAL, I mean the kind that takes hours to proof. This is in contrary to a lot of mass production bread that is churned out in a bunch of chain store bakeries or on the shelf in most major grocery stores. The easiest place to find the real stuff is in your own kitchen, where YOU made it. "Fast" bread may contribute to a lot of wheat intolerance in Americans because our bodies are incapable many parts of the wheat germ without the aid of yeast. The yeast break down the wheat and makes bread easier to digest and the by-product gives a better flavor to the bread. Anyways, the health benefits from slower bread are numerous beyond wheat intolerance, including possibly preventing diabetes. Like with red wine, I don't need a justification to consume homemade sourdough other than the fact that it tastes good- BUT it's nice to know you can enjoy a fine homemade pizza like Nathan's without a side of guilt. Right?

Read about the health benefits of sourdough for yourself

Tuesday, June 2, 2009

pizza pt. 2 - wet dough

i went home to richmond for the weekend to hang out with some friends and the family. i spent some time at my best friend's apartment in downtown richmond, and he showed me some tips to improve my pizza game. this guy has been making pizza in his kitchen for several months now, and has the process down pretty well. he made four pizzas with dough that rose in his fridge for about 24hrs. the dough was soft and spread almost instantly; no dough wrestling that resulted in any pizzas shaped like africa (see my first pizza trial). he used cento brand italian plum tomatoes that were seeded, rinsed, and drained to minimize bitterness and "steel can flavor." when the pizzas came out of the oven, there were great gluten bubbles in the crust, although i felt the pizza could have been left in the oven for 30secs more or so to give the crust a little more structure (it was almost too soft). however, this pizza is more like the pizza that im aiming for. to better understand his pizza process, he introduced me to a link:

http://www.varasanos.com/PizzaRecipe.htm

this guy, jeff varasano, was a software engineer turned pizza obsessor. he has spent countless hours testing almost every conceivable ingredient and technique in making the perfect basic, neapolitan pizza in his home kitchen. his instructions are often too detailed and a little too risky for my student apartment (no thanks to clipping the safety handle off of my oven's clean cycle- id like to get the security deposit back on my apartment).  however, i feel like his site is very helpful and practical if you take some things with a grain of salt. 

jeff emphasizes 3 things: 1) heat, 2) kneading technique, 3) yeast type. of the three, i have the most control over #2). my buddy is planning on growing his own italian yeast culture, but i am sticking with the store bought stuff for now because it's easily available and i want other people to replicate my recipes on this blog whenever possible. traditional pizzas are usually cooked in brick ovens which burn well over 800-1000 degrees (F), while the normal kitchen can only bake around 500-550. my oven dial goes up to 525ish on the bake cycle, but could probably get higher if i then switch it to the broil cycle (which i think is how my friend made his pizzas). in theory, my oven could cook over 900 degress on the clean cycle if i did the "varasano" mod on my oven- but im not. anyway- jeff quotes a recipe in his site that is very similar to what i was doing, except he says it is WRONG. haha! ohhh well. cooking is a process, remember? the first few trials did give me a feel for handling the dough and gave me confidence with working with flour (not my favorite cooking ingredient to manipulate). i plan on making some more dough with the following modifications:

  • using a MIXTURE of king arthur (KA) brand AP flour and KA brand bread flour, for added gluten and a better crust. this is similar to what jeff and my friend use. ill probably use a little less than a 50-50 ratio of bread to AP flour.
  • AUTO-LYSE step of making the dough- this is something that is common in breadmaking. basically, you add all of your ingredients into the mixer with the paddle attachment (but reserve a little of the flour), and mix until it all of the ingredients are a wet dough. then let the wet dough rest in the mixer for about 20 minutes. apparently this is a more effective method of developing gluten in your dough/bread. after 20mins then you can knead.
  • kneading a WET DOUGH for only 30 secs-1 minute. i dunno why this didnt make more sense to me earlier. good eats led me to believe that the dough should be a little drier and that it should spin in the mixer for 15mins. apparently not. think about pancake batter: you dont want to overwork/mix the batter or else your pancakes will not get fluffy and soft. jeff's page is really good on telling you what the consistency should be like (like a baby's bottom-ha!). quickly kneading a wet dough on some flour using a hand tuck and fold method (more on this in subsequent posts) will probably be more effective.
  • using less olive oil when putting the dough in the fridge to rise. the oil burns at higher temperatures and can give off some funky tastes and blacken your pizza stone. 
  • using uncooked tomatoes in the sauce, for a fresher sauce. theres no need to cook it twice. i cooked my marinara the first time to tweak the flavor of my kroger tomatoes of unknown taste and quality. next time, ill get something of a little better quality. 
unfortunately, i will be away from kitchen for the next few days and will be in winston-salem for a debate conference. the next few updates will be a mixture of describing some of my more classic recipes and reporting on the excellent food finds from NC. 

***UPDATE***
i made pizza from the last bit of dough leftover from the batch i made last thursday. this dough was rested for basically 5 days and it had an extremely soft texture, similar to the texture i felt at my friend's (or "baby bottom soft" as varasano would put it). this dough ball was super easy to stretch, and i got the pizza quite thin (as you can see from the pictures). i baked it at 550 degrees (the highest my oven does on "bake") since i was inspired by my findings on the effect of heat on the quality of pizza. it took a little more than 4mins to cook, whereas the pizzas i baked around 500-520 degrees took over 5-6 minutes. there was some decent puff on the crust but i still need to tweak the recipe. overall- dough that has rested for several days isnt too bad of a thing. 

im a fan of basil baked under the cheese as well as fresh basil after the pizza has cooled for 2-3 minutes (or else it will blacken). the baked basil is crispy and has a slightly sweet taste while the fresh basil is pungent and full of flavor. 

this cross section shows how thin the pizza was, and how part of the crust didnt rise and bubble too much. 

same slice of pizza from the other side- many more gluten bubbles. 


just a little bottom shot- a little bit of good charring around the top edge of the pizza. i credit this to the higher temp.

Saturday, May 30, 2009

pizza party

after testing out some pizzas with some food lion mozzarella and prego sauce, i stepped it up a notch for some friends coming into town. i made a traditional pizza margherita with homemade marinara and smoked mozzarella cheese and a prosciutto and goat cheese pizza with homemade black mission fig spread. 

on the fig pizza (above, right slices), you can see how my crust has some nice air bubbles below the surface of the crust. these are OK bubbles, as it makes for a more airy crust. i guess this game about from my rolling skills before the final proofing of the dough. below is a second pizza margerita that i made, and i think it has the best crust of them all:


my experimentation with pizza


i decided my first substantive post would be of my current project: pizza. if youve ever had homemade pizza or really good pizza from a restaurant, you know that delivery pizza is never a substitute for the real thing. some downtime during the summer gave me the opportunity to test out my pizza making skills. i first did some research by reading some pizza dough recipes, watched a few youtube clips (including the good eats - thin is beautiful episode), and consulting my friend (who is a veteran of at-home pizza making). next- i got the right equipment. this basically involved a mixer and a pizza peel (or paddle). i use the paddle and the dough hook attachment to my mixer. obviously, if you dont have a heavy duty mixer like mine, then you can resort to hand kneeding your dough. this involves mixing the wet ingredients in a "well" made of the dry ingredients. to understand this technique, i suggest youtube'ing a few videos. i use the mixer because its faster and easier. the pizza peel took me a while to get ($15 at the local mennonite farmer's market) because they really considered a speciality kitchen item. check online at places like amazon.com for some more affordable ones. ALSO- use a pizza stone or quarry stone (available from your local lowe's or home depot for cheap) as a surface to cook the pizza directly on top of. the pizza stone stays in your oven on the bottom rack when you preheat the oven and allows for even cooking (see the good eats episode for more info). anyway, onto the ingredients.

in the mixer:
  • 2cups all purpose flour (i used king arthur's brand, which is widely available, is high quality, and has a fairly high level of glutenous protein. good eats' alton brown also said that you can also substitute any flour that is made for bread machines, which have high levels of protein also).
  • 1 tablespoon of (kosher) salt
  • 1 tablespoon of extra virgin olive oil
in a measuring cup or another cooking vessel:
  • 3/4 cup of warm water (should be around 100 degrees or just warm enough so that you can feel that the water is warm, not hot.) this should go 
  • 1 1/2 tablespoon or so of sugar
  • 1/4 teaspoon of active dry yeast (available in the baking or butter/egg/dairy aisle of most grocery stores)
mix and let the water, sugar and yeast set out in their container for 5-10 minutes. if you are successful, there will be a bunch of frothy bubbles that form on top of the water- that means youre yeast are ready for the pizza party. if you dont see any bubbles, then maybe your water was too warm/not warm enough (so try again) or maybe your yeast packet was bad (and the yeast were dead on arrival). 

after your yeast mixture blooms, pour the wet stuff in the mixer with the oil and dry ingredients. i use the paddle attachment on my mixer first and beat the mixer on low (setting 1) until most of the flour is incorporated. after a few clicks at setting 2, i add a little more flour until the dough mixture is just slightly sticky (wet) to the touch. then i scrape off the dough from the paddle and put on the dough hook after greasing it with some cooking spray. i vary the dough hook speed from medium (2-3) and gradually add flour until the dough ball no longer sticks to my fingers (i pull it off of the hook, and hand knead it for a second to get a feel for the dough). this is crucial. if youre dough is too wet, you could mix it for days and still not get a good consistency (which i struggled with badly my first attempt) and if it is too dry (and thus, in need of water), it wont be easy to roll out later. anyway- keep adding flour and beating it in the mixer for about 15-20mins, pulling it off the hook every now and then and if the dough separates into multiple balls. to tell if its done kneeding, i take a golf ball size of dough out and hand pull it, like im making a mini pizza. if you can stretch the dough enough so that you can see your finger behind a thin (drumhead-skin) layer of dough without it tearing, then youre good to go. if not, then keep mixing it and/or add a bit more of flour. 

the next part involves you squeezing the dough so that you make a ball out of it, similar to mozzarella cheese. you want a tight, smooth, skin around the dough ball and pinch the rest behind the dough ball. for more specific technique on this, refer to the good eats video (sorry that i didnt take any pics). then put the ball in a glass/steel/plastic bowl that is roughly 3-4 times larger than the dough ball, smear the ball in olive oil to coat, and put plastic wrap on the bowl. from here- the dough could go one of two ways: 1) park it in a warm area (or just on your countertop) for 30-40mins if you want pizza immediately. 2) park it in your fridge for 24hrs or so and let the dough rise slowly. the latter option is always better for taste, as slower rising dough has more time to develop flavor, however- sometimes you just gotta feed yourself or your buddies in a flash. 

after the dough rises [whether via option 1) or 2)], then i split the dough ball in 2 with a knife (thus giving you enough dough for 2 personal pizzas). with each half, i press and beat it down on the countertop (cleaned of course!) and pop/smooth out any air bubbles that the yeast formed (or else your pizza will explode). after smoothing it down into a thin layer, then reform the dough into a bowl like you did earlier. let that dough ball rest for anywhere from 15 (if your dough was at room temp) to 30 (if you took your dough out of the fridge) minutes. it should feel sorta like the dough you get from those pilsbury cans, room temp and sorta spongy, before you try to roll out your pizza. 

after this proofing, its time to roll. on a pizza peel/plate/cutting board/turned over cookie sheet dusted with flour, you can begin to roll out your pizza. i do the stretch from the center and pull method, so that i can get a gentle, even pull while trying to minimize and breakage. this takes some trial and error. just try and get the pizza dough as even as possible and make it fairly thin. ive found that the best thickness of the crust results from a little bit of rolling (using a wooden rolling pin/wine bottle with the stickers removed) dusted with flour. this gave me an even crust that wasnt too thick. if youre dough keep stretching it, then maybe you should let the dough sit for a few more minutes and try again.

at this point, preheat your oven to its max temperature (BELOW CLEAN/BROIL!) which should be around 500-525 degrees. yes it will probably smell of burnt cheese from all those lame frozen pizzas that have dripped in your oven, so it wouldnt hurt to turn on your fan/open the windows if you can. 
 
after you have some sort of shape (my first trial resembled the shape of africa) stretched out on your pizza peel, shake the peel back and forth to make sure that your pizza dough slides easily on/off of it. if not, then add more flour before preceding to the toppings. first, brush the crust with olive oil to help it brown without burning. dont make the crust too large, as it will expand in the oven. next- put a little bit of sauce in the middle and swirl it around. DO NOT dump a bunch of sauce on your pizza. this will result in a lake of liquid in the middle. pizza places use less sauce than you imagine- you just want enough to barely coat the non-crust of the pizza. you can use a canned/bottled tomato sauce or make your own. next- add whatever spices you like on top of the sauce: red pepper flake, oregano, etc. i also like to add some fresh basil from my herb garden at this stage because this basil crisps up (without burning) under the layer of cheese to make a more intense basil flavor. the next layer is cheese- i use low moisture mozzarella (the shredded kind in a bag is fine) and a little bit of parmesan for flavor. slide your pizza on your peel as a double check and into the oven it goes (make sure its preheated)!

this suckers dont take long to cook- less than ten minutes. check after about 4 minutes. pop any giant air bubbles that form in the crust with a knife and let it cook until the edges of the crust are just barely golden brown and the cheese is melted. slide your peel/plate under the pizza (dont burn yourself- its hot in there!) and admire your pizza while it cools for 3mins or so. after cooling, you can add more fresh basil on top and youve got a pizza fit for a king! actually- youre first few runs will probably turn out less than desirable. dont quit though! ill post some pictures of my pizza creations in the next post. good luck!